Letter Sound and Sight Word Egg Hunt

Spring is here in Chicago and with spring comes all things flowers, rain, sunshine, gardening, and eggs. Egg hunts have always been a favorite in our house (as I’m sure they are in many homes!) and plastic eggs can be used for so many great literacy activities. With a quick Google or Pinterest search, you will find dozens of fun ways to use plastic eggs to practice both literacy and math skills.

Plastic Eggs.PNG

Since my boys are both working on different skills, I used the eggs to create two different activities for them. They enjoyed being able to hunt for eggs together! Once they finished hunting, they opened up their eggs and worked on their individual activities.

Alphabet Picture Matching

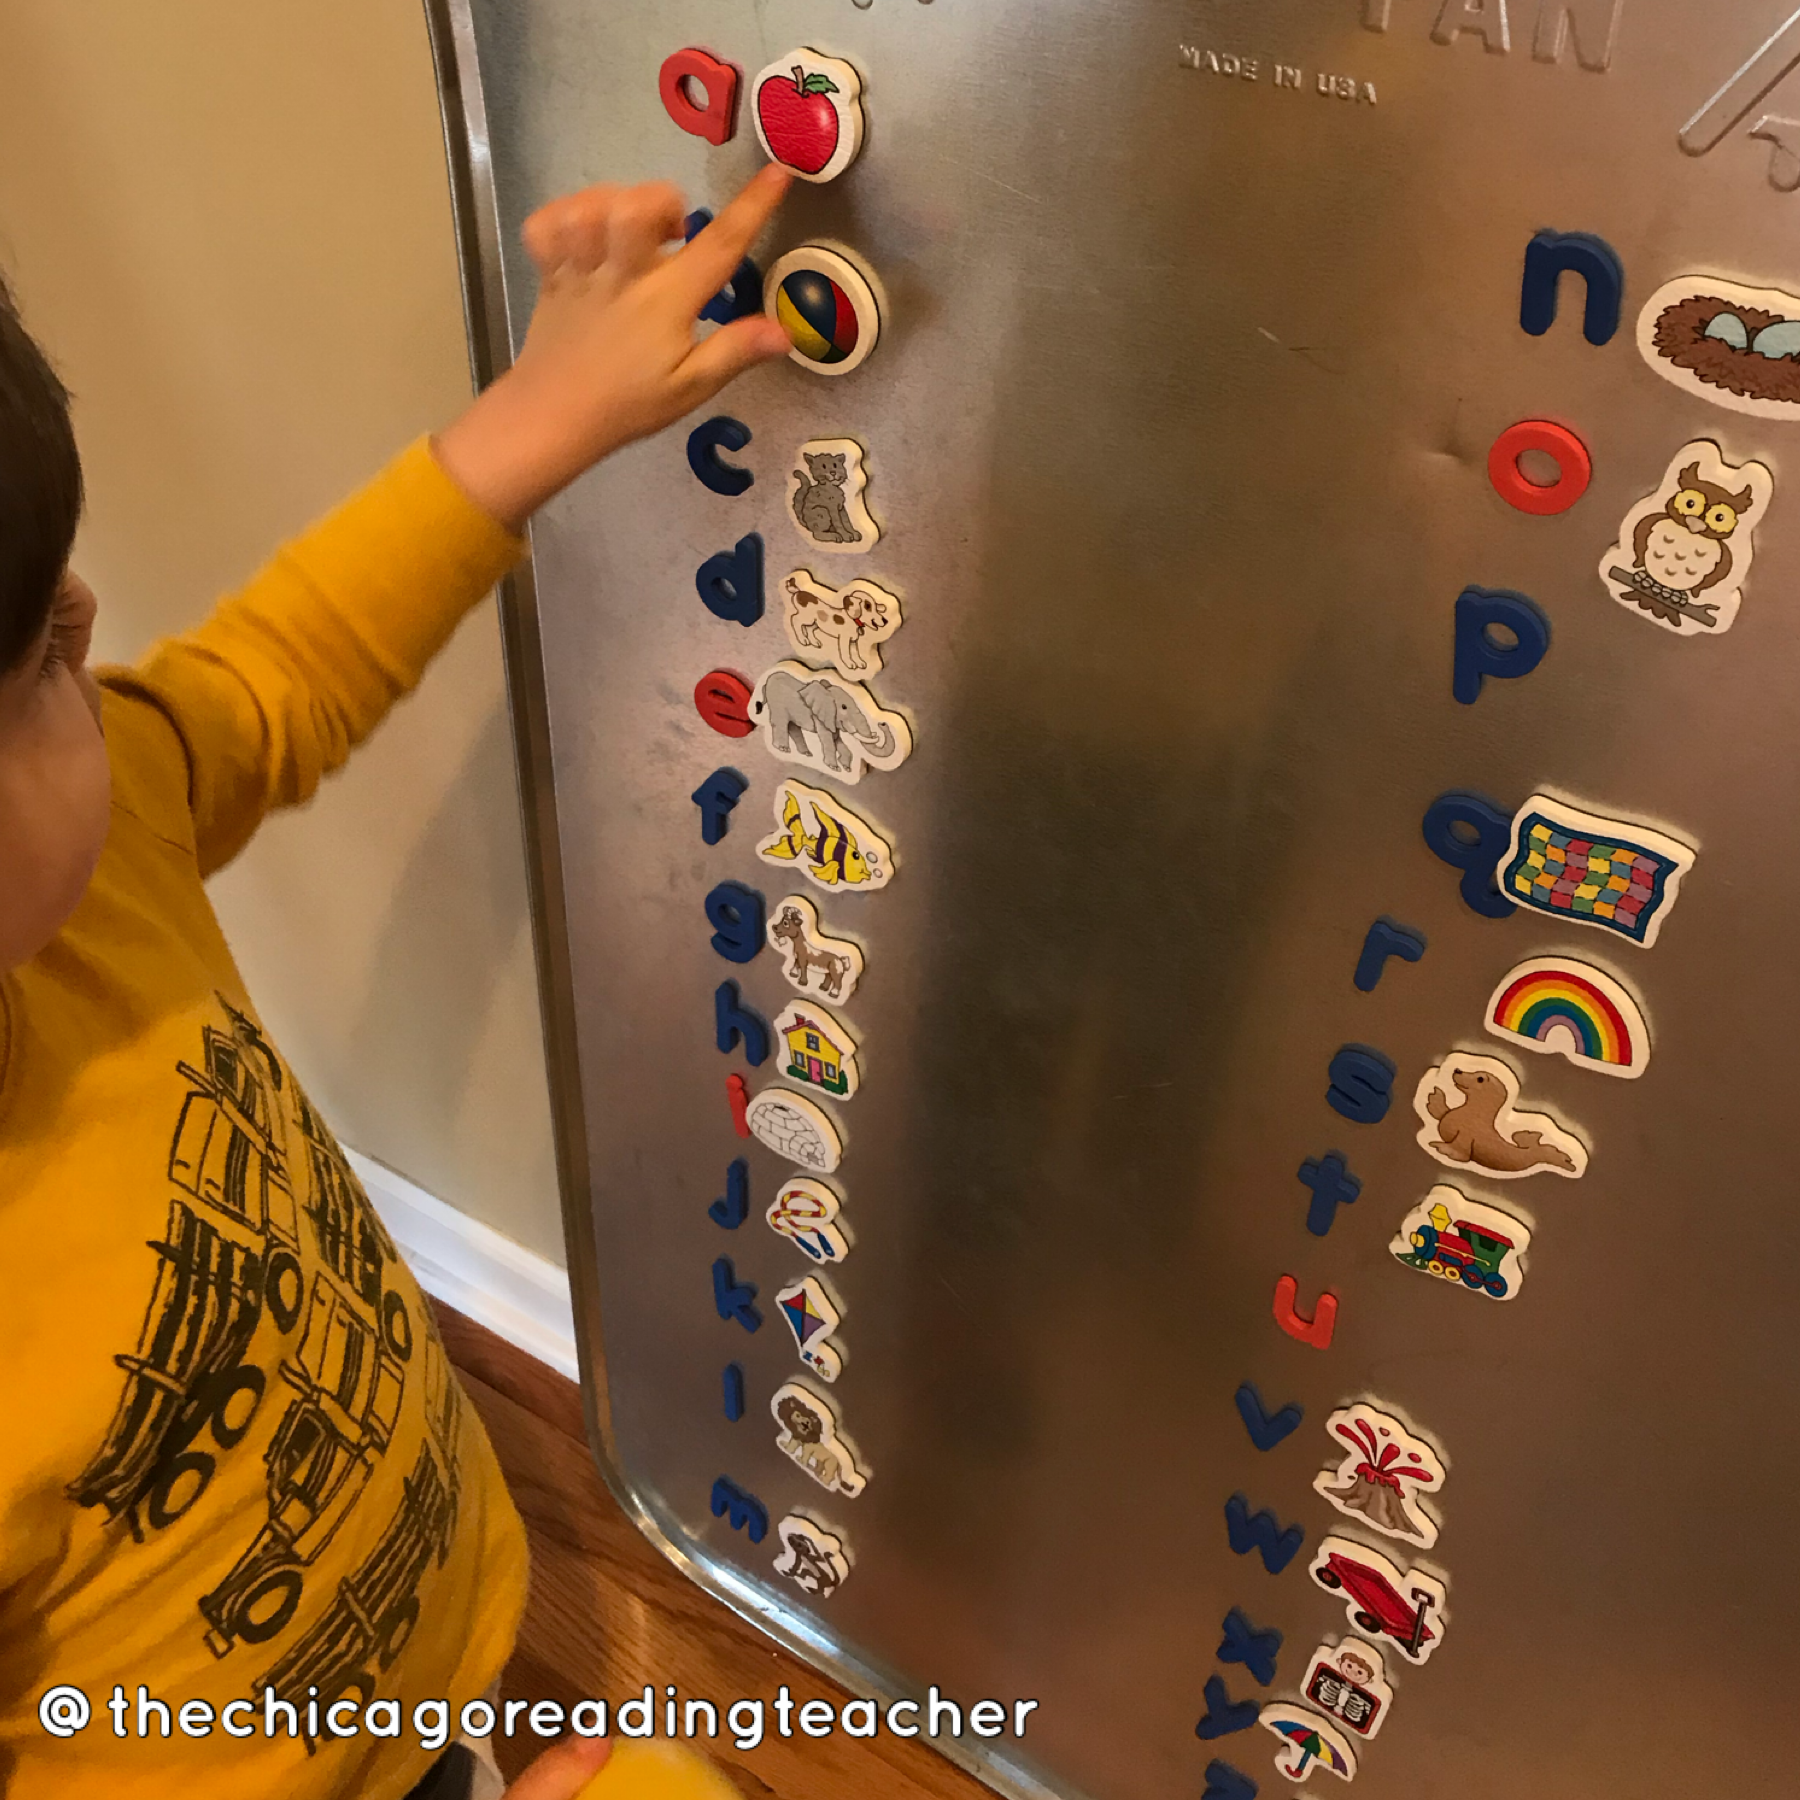
My 3.5 year old is working on letter sounds, so his goal today was to match pictures to their appropriate beginning letter. Below is a list of the materials we used for his activity. We recently picked up these magnetic pictures and they have been a great addition to our learning materials!

Materials

  • Plastic Eggs

  • Magnetic Letters (this set is also great. I prefer letters that have red vowels and blue consonants for later phonics work)

  • Magnetic Pictures

  • Magnetic Surface (we have an oil drip pan I found at Walmart, which is a nice large surface, but you could use your refrigerator, radiator cover, baking sheet, etc.!)

IMG_5143.PNG

Earlier in the week, we worked to match the pictures to their beginning sounds on the oil drip pan, so to set up this activity, I just removed a few of the pictures and put them in the eggs. Once my preschooler collected all of his eggs, I made up a fun little story for him! I said, “Oh no! The pictures are lost. Can you help them find their home by matching them to their beginning letter?” He went through each picture and matched them to their beginning letter on the drip pan. As he placed them next to the correct letter, we said the name of the picture and the letter sound.

letter picture match.PNG

Sight Word Egg Hunt

My 6 year old is working on building his sight word vocabulary, so I prepared a sight word activity for him. For this activity, you’ll need materials below.

Materials

  • Plastic Eggs

  • Blank Paper

  • Lined Paper (we love these primary journals from Amazon)

  • Pencil

Sight Word Egg Hunt.PNG

Preparing this activity was super simple! I have a list of sight words that my son is working on, so I selected 6 of those words and wrote each word on a small slip of blank paper. I tucked one sight word in each egg and hid them around the house. Then, I wrote out a sentence for each sight word, with a blank where the sight word belonged. When practicing sight words, we always use the words within context in addition to practicing them in isolation so that we stay focused on the meaning in addition to being able to read the word quickly and fluently.

Sight Word Egg Hunt Sentences.PNG

With just a few simple materials and a few minutes to prepare, you can integrate some literacy learning into your spring and Easter traditions. I hope this is a fun activity for you and your kiddos!

Keep Reading!

Jill :)

*this post contains affiliate links

Building Block Letter Match

Building Block Letter Match

Who doesn’t like building with connecting blocks? LEGOs are a classic toy, loved by children and adults of all ages, so what better way to get kids motivated than by incorporating their favorite toy into alphabet learning! With this simple activity, kids will be able to practice a variety of skills, including:

  • Letter identification

  • Letter Matching

  • Color Matching

  • One-to-one correspondence

  • Fine motor skills

  • Alphabetical Order

Sight Word Hopscotch

Sight Word Hopscotch

Today we got outside for a little sight word fun! I wanted to incorporate some movement and play into our sight word practice, and this morning we had a few hours of nice spring weather. I knew we had to get outside and take advantage of it before the rain this afternoon, so we mixed some literacy practice into our outdoor play with Sight Word Hopscotch!

Color Words Parking Lot

My 6 year old has been a car lover since he was a baby, pointing to cars and trucks that drove by during our stroller walks years ago. As such, we have accumulated a LOT of cars in our toy bins. When he was just a toddler, I started making him roads, parking lots, and little towns on cardboard and he LOVED them!

My son at 2 years old matching numbers on cars to numbers in the parking spots.

My son at 2 years old matching numbers on cars to numbers in the parking spots.

When he was 2 years old and showing some interest in learning letters and numbers, I started incorporating some academic learning into these creations. We started by labeling parking spots with numbers and creating corresponding numbered cars. I labeled the cars by adding a small strip of tape on top of them and writing numbers with a permanent marker. He would play for hours with his cars, matching the numbers on the cars to the corresponding parking spots in his town. It was a HIT!

Our town has expanded!! Here my little guy is 4 years old and playing with his town, where he matched his cars to the numbers in the parking lot.

Our town has expanded!! Here my little guy is 4 years old and playing with his town, where he matched his cars to the numbers in the parking lot.

Now that he’s 6 and in kindergarten, I wanted to take this concept and modify it to help him learn color words. Today, we made a little town on craft paper with a couple of stores (I let him choose - and he picked a toy store and Costco ;)) - it’s a good way to pretend to get out and live a normal life amidst this coronavirus quarantining we’ve been doing! For each place in our town, we added a parking lot and labeled each spot with color words that matched his toy cars.

Hudson Making a Color Words Parking Lot.PNG

I drew the town for him and labeled most of the parking spaces, with his input. I wanted him to have some practicing writing the color words, too, so I saved a few spaces for him and he got to work writing them out. He was SO excited to have this new town to play with - it’s been quite awhile since we’ve made one of these.

The completed color words parking lot!

The completed color words parking lot!

After we completed our parking lot, we got to work - PLAYING! Is there any better way to learn than to incorporate play? Our answer is NO - playing is the BEST WAY TO LEARN! When learning is fun, children (and adults!) are more likely to retain the information and make those critical connections in their brains. We had fun parking our cars in the parking spots while imagining scenarios where we visit each of the locations in our town.

Parking cars in the color words parking lot.PNG

If you are working color words, this is the perfect vehicle (see what I did there? ;)) to incorporate some play into your learning! You can easily modify this activity for learners who need more support by writing each word with the matching color. We love to use Mr. Sketch Markers because the scents add a bit of extra fun to our projects!

Cars Parked in Color Words Parking Lot

This activity can be adapted to match a number of different learning objectives - just add some tape to the top of your cars and label them. Here are some of my ideas:

  • Matching upper- to lowercase letters

  • Matching numerals to dots or number words

  • Matching addition/subtraction problems to numerals or dots

  • Matching letters to pictures with that beginning sound

  • Matching short vowel words to pictures

  • Matching digraphs to pictures

  • Matching sight words

I hope you try this out with your little ones at home. If you do, please comment and let me know how it went and what you worked on!

Keep Reading!

Jill

*this post contains affiliate links

Daily Organization

My organization trend is continuing today! Our schedule and daily lesson template were both helpful, but yesterday I realized that I needed a way to organize our materials so they didn’t end up in piles mixed in with toys all over the house (thanks to a very curious 3yo :)).

I went to work to create some labels for each day of the week and printed them on fun, colorful paper. I also created labels for books, materials, resources, and supplies. After printing and laminating, I secured them to some bins from the dollar store and voilá! I instantly felt more organized.

Snag the labels below for free in my TPT store.